If you are a graphics designer, At some point in your life you need to create cards. It might be student cards, staff cards or even another kind of card that contains images / photo’s in it. If you are a corelDraw or Illustrator designer you might be not have option to do photo merge. This tutorial explain how to do print merge with photo. Its 100% Free
How to do print merge with photo / Images
As explained in the above video, In the latest version of coreldraw, you dont have this feature. For this to work you need to export your artwork in corel draw as eps file. This way the quality of your atwork will be intact. After this you can import your design in adobe Indesign without loosing anything in your artwork. After that perform a simple data merge using indesign. If you have any doubt ensure to comment it below, so we can fix it together.
Simple Print merge in CorelDraw
Tutorial on Print merge Corel
An Excel document with CSV design (Example: abc.csv)
Stage 1: Open the Corel draw. Then, at that point explore to File > Print Merge > Create/load Print Merge.
Stage 2: Print Merge Wizard exchange box will be shown. Select “Import text from a document or an ODBC information source”, then, at that point click on Next button.
Stage 3: Locate the document source, which is the Excel record inside CSV design. Snap on “Peruse” symbol and select the document.
Make a point to choose the record types as “Comma Separated File (*.csv)” starting from the drop menu close to File name.
Stage 4: Once you select the document, press Next button. An exchange box will show up inside data from the Excel record. If it’s not too much trouble, twofold check to guarantee you are utilizing the right information. Then, at that point, press Next.
Another discourse will seem to show all information from the Excel document. Press Next when you wrap up really taking a look at the information.
Stage 5: Finish the wizard box.
Stage 6: From Corel Draw screen, you currently can get to Print Merge toolbar as displayed beneath.
From the toolbar, select the field you need to add to your plan and snap on “Insert Print Merge Field”. The field is then added as a text object (Repeatedly measure with different fields).
Stage 7: Click on Merge to New Document. You presently can print with your printer with all printing objects allotted on the plate.
How to print merge with photo in CorelDraw (PAID METHOD)
It is said that E Cut at Macro Monster can do print merge with photo’s. However, Personally I did not try this and I do not recommend this. Why should we pay for a tool like this, when it is already available for free. CorelDraw is a vector designing tool. So it is acceptable to not have this print merge with photo feature. As I mentioned in the above video, you can import CorelDraw design to InDesign and perform the data merge which will contain the image and will be properly displayed on the design.
Well I cant pay But I am a developer, Can I develop a one like that.
The short and sweet answer is YES. If you are a developer you can develop macro’s that will perform the print merge and display the images. But to make it perfect you need a lot of coding. To be honest it depend on design. If you go to YouTube and searched for macro tutorials in CorelDraw, you will find something to start with. But you might need to adjust the coding a bit so, your macro will perform the print merge in the way you want. If you search the web, you might find some macro, but these macro’s will be most likely outdated. So you need to adjust the code to work it with the version of CorelDraw you are using.
HOW TO POST TO MULTIPLE GROUPS ON FACEBOOK IN ONE CLICK
how to post to multiple groups on facebook
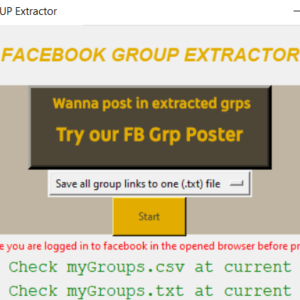
Its time to post for me to show you how to post to multiple groups on facebook on one single click. All you need to do is prepare the list file with facebook groups and this free tool will post to multiple groups on Facebook. Dont worry, we will show you how to get links to all your facebook groups and how to filter the list to your needed groups. This method will get traffic to your links in few clicks. If you have any question about this free tool make sure to comment it below and if you want to take it to the next level make sure to Contact Us
Method 1 On how to post to multiple groups on facebook
This video is about how to post to multiple Facebook groups at once 2021. As of February 2021 Facebook have removed this feature, so here is a automated software that will post to multiple Facebook group at once on 2021.
To do this first of all, you need to watch the video above. Once you understood how to post to multiple groups using the software click the link below to download Facebook groups software.
The Social Auto Poster software is not created by US and some of the users have found that this software is difficult to post to multiple Facebook groups at once, So I have created a new software (Which I will explain in below). However you can download Social Auto Poster software and give it a try. Ensure to check up to bottom of this post to see our facebook post poster.
This software is outdated (still works with chrome V89), and we recommend to use software below (Method 2)
[contact-form-7 id=”614″ title=”Social Auto Poster (Including FB Grp Poster)”]
Method 2 on how to post to multiple groups on facebook (New Method)
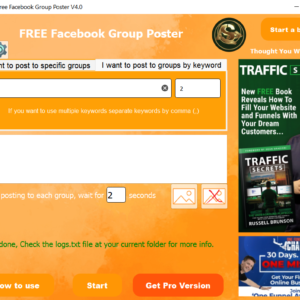
The above video on Facebook group poster uses little outdated software, This is why I decided what if I coded a program like this on my own. So I started the Facebook group poster project on programming language PYTHON and created a Facebook grp poster with much more features and it is so simple. This program can
Post Text
Post Multiple Images
Post Multiple Video’s
Simple txt file upload
Etc…
Now if you want to know how to use this software check the video below. If this guide helps make sure to subscribe to our YouTube channel.
As you can see in this software, You can post to multiple Facebook groups with photo or even video’s. But the thing to note is that these are the automation scripts I have created based on the Facebook website. In future if they change the coding on the website we might need to update the program as well. This is why I decided to share the source code of my python script. However, if you don’t know the coding, no need to worry just download the program using below form and run it.
Pro version and free version
The Facebook group poster designed with us will have two version, A free version, that you can download without providing any payment details. The paid version need to be purchased for $15. However, there are always sale’s going at zaarm tech, so make sure to grab it, while it is in sale. Also you can get coupon code by completing specific task at zaarm tech. Make sure to follow us at http://facebook.com/zaarmtech and http://instagram.com/zaarmtech to get coupons for the products we sell at http://zaarmtech.com
Recently, I have added all features in pro version to free version. The free version will have limitation. However, you can try the free version before purchasing the full version. If you cant to get some more info on pro version and a coupon code watch below video.
Why stop with free version, What’s new in PRO version
Recently, I have added all features of pro version to the free version. Right now, the only limitation in free version is that it will limit the number of groups you can post. We want to let you try the software before purchasing.
Can I buy traffic to my social media?
Basically the reoson you need a facebook group poster is to get traffic. And more importantly free traffic. If you want to achieve this without using facebook groups, the most common thing is to check The first and most important thing is not to buy any just random bot traffic. You could use different google ads or Facebook ads to drive traffic. If you want a cheaper one check our article on How to buy social media marketing? Cheapest SMM
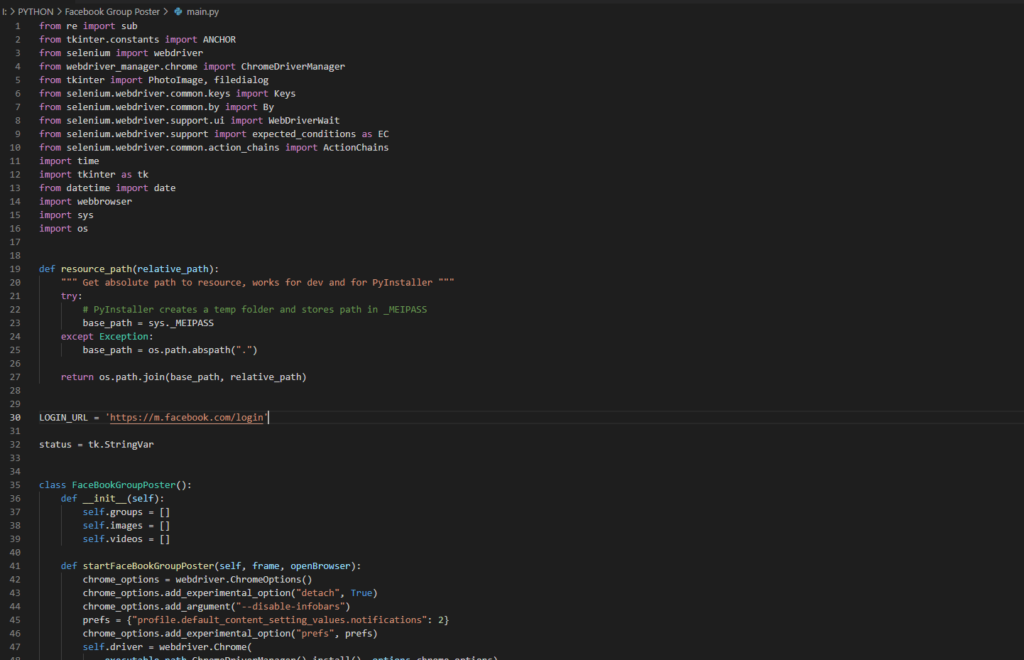
The Source Code
This code is written in program language known as python. So to run this script you will need Download Python and setup your PC. You might also want to download some code editor if you want.
FB GROUP POSTER THUMBNAIL
To run the above code ensure your have python installed and added to path. To run the script you need to open CMD and type “python ‘pathtopythonfile.py'” and hit enter. Once again you dont need to do this if you are not a python developer. You can always download .exe
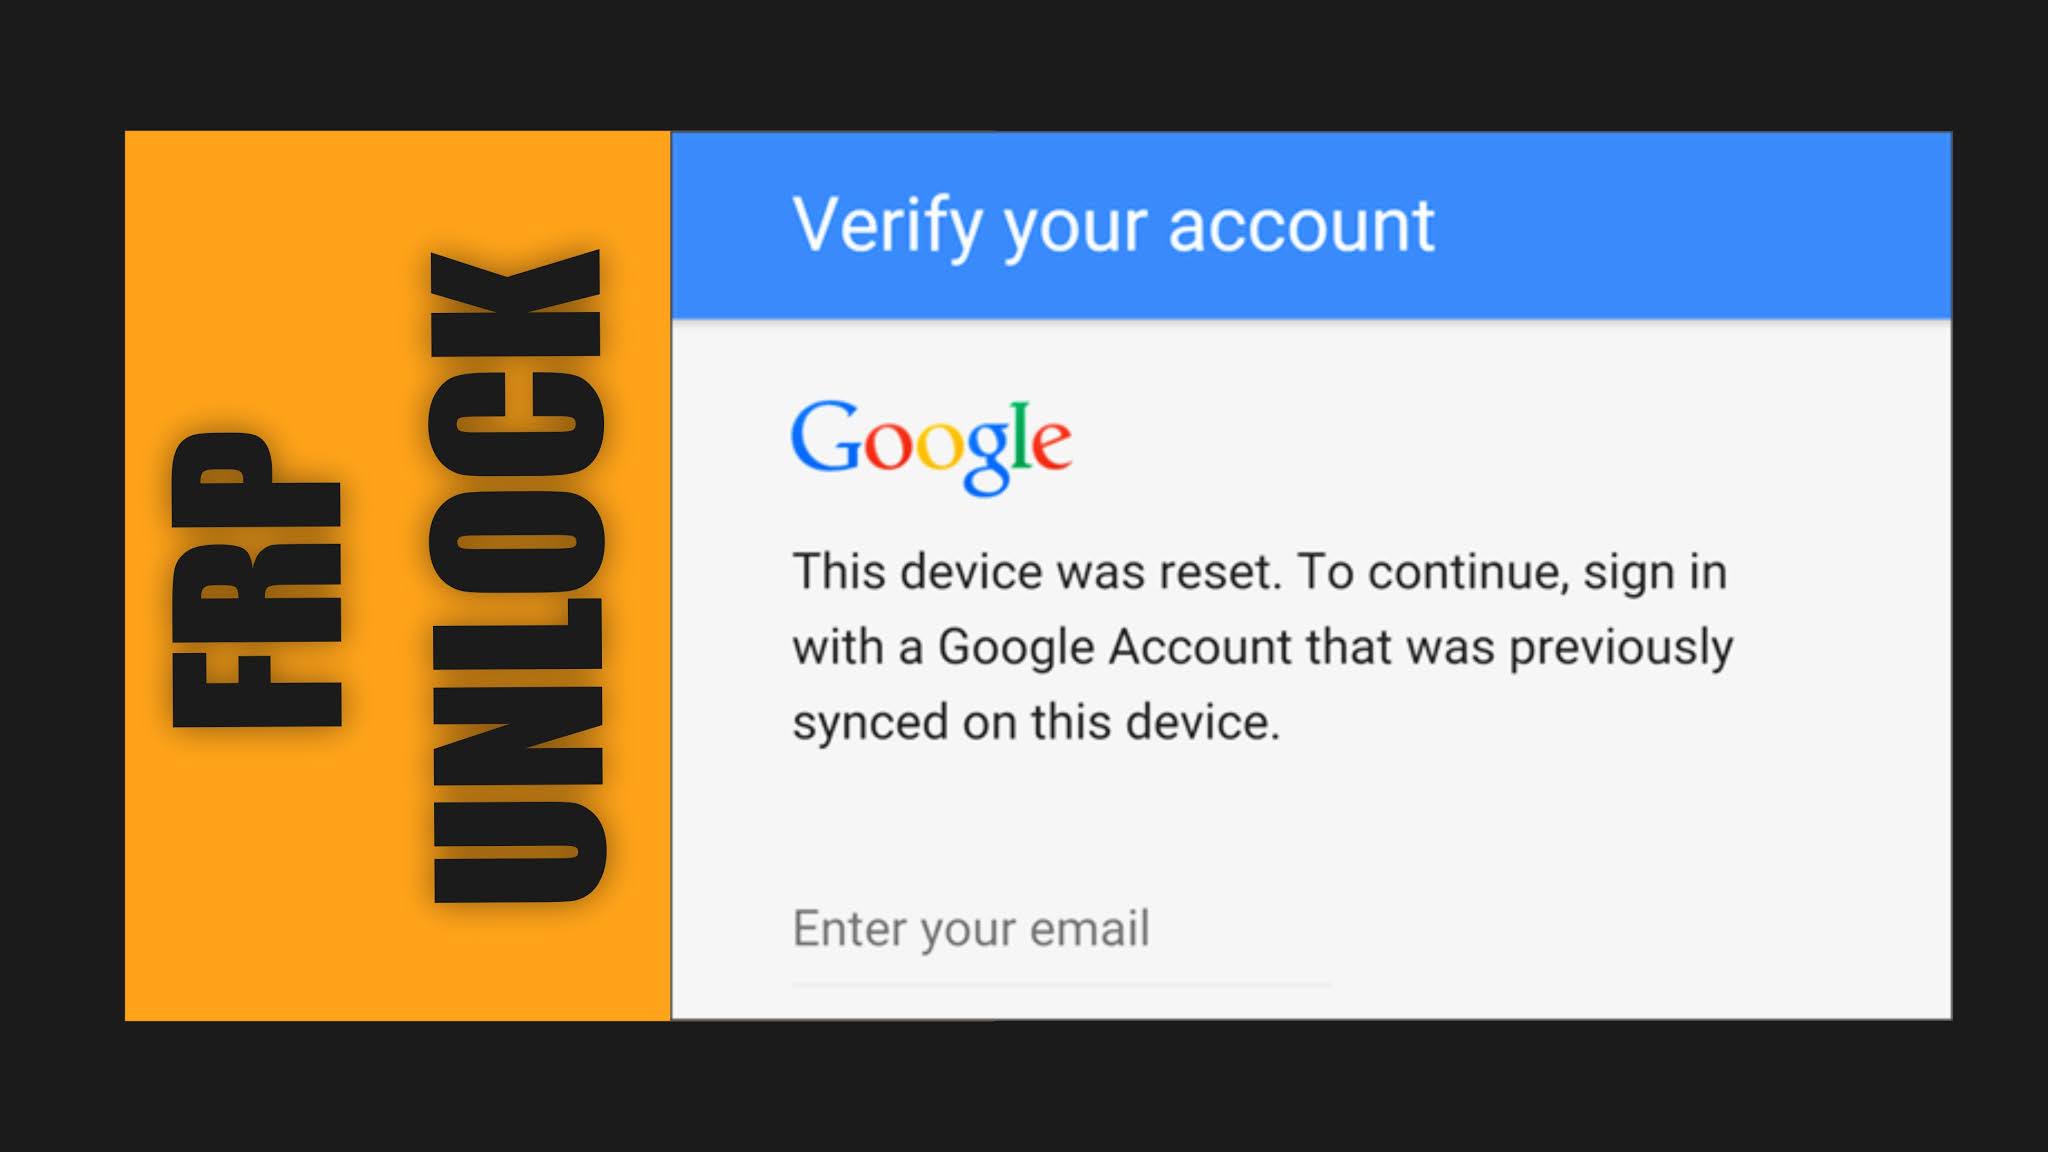
Hello everyone, welcome to the blog. This tutorial will explain how I removed the FRP lock on my Samsung J7. This method can be applied to any android phone. So you can say this tutorial is about how to remove FRP lock on android devices.
How are we going to remove FRP lock on android device, The short and sweet answer is that we are going to delete the user data that have stored your previous email and FRP setting, so that when you open your device it won’t ask for any previous emails stored on your device.
So before starting I will go briefly on what is FRP lock and what it does.
Factory Reset Protection (FRP), is a security feature on Android devices with Android OS Version 5.1 (Lollipop) and higher. The FRP provides a built-in security feature you are able to use that protects your device and information, including screen locks and data encryptions. The FRP is enabled automatically when a Google account has been registered on the device and will be disabled if the Google account is removed from the device prior to the Factory Data Reset. Once the FRP has been activated, it will prevent use of your device after a Factory Data Reset in an untrusted environment. This means if your device has been Factory Reset in any other way than Settings General Management Reset Factory Data Reset, the FRP Lock will be enabled. So basically when FRP lock is enabled you will be asked to sign in using a google account that was previously synced on your device.
Now enough talk, let get our hands dirty. One more this before proceeding.
We won’t be taking any responsibility for anything that happen to your devices, however we will show some tricks at end to solve any problem you face during the procedure.
To begin with get the required files by filling above form. The above form collects your email in exchange for email address. Do not worry, we wont spam you, but we will send you updates only when we have a new post.
After downloading the zip file from the link in email, extract the zip file and open the folder. Now you will see 3 files that I used to remove FRP lock on my android phone. As I am using a Samsung device, I am installing Samsung usb driver. Make sure to install the appropriate driver for your device. For some device you might not need to install any driver at all. But to be on safe side, make sure to install the usb driver.
After the installing is complete unzip or extract the odin file and open the odin file. Odin is used to wipe the user data on your device using exynos file we have downloaded. After opening the odin, you need to connect your mobile device to your PC using an usb cable.
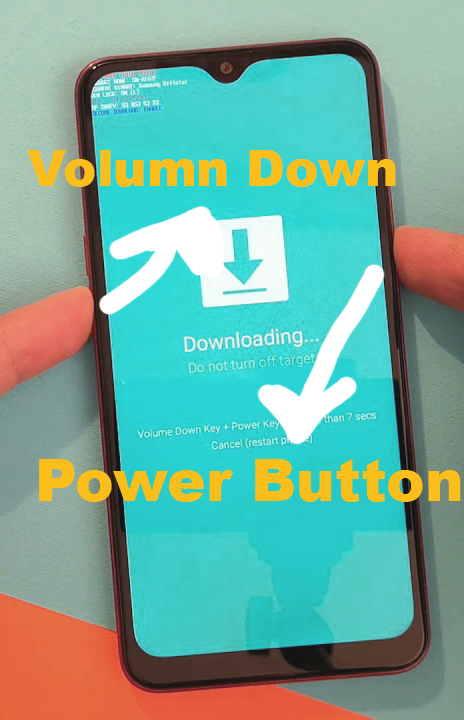
Make sure to use a strong usb cable, the cable that came with your device would work perfectly fine. Once connected you need to boot your device in to recovery mode. To boot your device into recovery mode turn off your device and press power button, volume down key and if there is main home button in your device, press that all three or two button at same time. Once, you see your manufacture device logo, remove from three buttons at once. It might ask for confirmation in some devices, in that case press yes or continue using the volume up key.
Pres the button required to go to this screen
Once you are in recovery or download mode, you can go back to odin and start the process. In odin you need to see “added” message now, if you have done everything as I have instructed.
As I have not connected any device to my PC it’s not showing added but for you it need to be showing on the screen. Next thing is to check the AP and click AP button. This will open a new dialog and now you need to select that Exynos dot RAR file.
This is what you see when you are processing rar file..As mentioned do not turn off your device
Once selected click start and now to will start the process. You will see a progress bar on both odin and android device as things proceed. Once the process is completed your android device will automatically open and you won’t be asked for any previous synced email address.
Its done, But one last step
If your notice any problem like storage full or anything, now you can do a factory reset directly from the setting.
How to do a factor reset after opening the device
Remember that I have told you in the begging about how I can fix my device if anything happens. For that also you need to follow exact process, but instead of selecting the Exynos dot RAR file you need to download the firmware of your device from any website select that file. These are some of the websites that you can use to download the firmware.
If this video helps make sure to give a thumbs up and comment and subscribe to our channel for more tutorials like this. Also check my other tutorial on WordWeb(Offline Dictionary)
Video Tutorial on how to remove FRP lock on android phone
Is this all, What if it doesn’t work for some reoson
Removing FRP lock is tricky and will vary from device to device. Another working method that I found is to insert a SD card to device with some application to launch your home screen. I am sure if you google for your phone model FRP removal, this method will popup. I wont be explaining that method here, but if you have a question make sure to comment it below
how to reduce multiple photo size at once without losing quality
How to reduce multiple photo size at once without loosing quality?
To achieve this navigate to bottom and click the download button. This will open a website that have download link of software that we are going to use. From there you can install the software for completely free. Open the software and drag all the photo’s you want to compress without loosing the quality. This will show a alert saying that do you want overwrite the compressed photo or create a new folder to store the compressed photo’s. Select the option you prefer and all is done. Now all of the those photo’s you dragged to software will have reduced file size and quality will remain same. Isn’t it easy.
This have proven quite useful for bloggers to photographers. Bloggers want a smaller size of image because it will load faster on the web, hence decrease page loading time. Photographers take high quality photo which were going to take a lot of storage. So even if they drag and drop those thousand of photo’s they will save GB’s of storage from their storage devices. While you are here at zaarmtech make sure to check our tutorial on LATEST TRENDS IN INFORMATION TECHNOLOGY
What’s this software that we are going to use?
JPEG Mini is a handy application for various field users mainly photographers, photo editors, designers those who have daily workflow of images with JPEG formats. The application offers users a tools to minimize or reduce the size of their JPEG file without losing image quality or pixel integrity. Through this way, users can save a ton of space in their drives, memory cards or USB drive.
Get the smallest picture record size without compromising high-quality or converting your workflow. The best thing about them is that as they are having a desktop application. You don’t need to upload anything to cloud. Its all done natively on your PC. All you need to do is get the Software.
Simple and easy to use especially with drag and drop.
Fastest operations.
Compress JPEG formats.
Save more hard drive space.
Modern wonderful graphical user interface.
Support different Cameras.
Many modes for optimization.
The license of JPEGmini is valid for lifetime, and offers update for 1 year. As like software’s there are full version for free on sites like GetintoPc . However to support developers I recommend you to purchase it through their website. They have a one time fee of 59 dollar that will give you the full access to the application for lifetime.
Are you a lightroom or photoshop fan?
If you use lightroom or photoshop, you can add their plugin to the software. This way you can perform JPEGmini functions directly from your photoshop or lightroom.
Yes, Its difficult believe, So watch this video of me trying the software
how to reduce multiple photo size at once without loosing quality
There are other software or online tools like this, but if you are planning to get a easy and bulk processing software then I recommend JPEGmini pro for you.
The JPEGmini pro Suite photo Optimization software program is a image resizing utility designed to reduce average file sizes without sacrificing photo nice, resolution, or format. Capable of decreasing your JPEG record sizes through as much as 5x, this tool affords an efficient solution for releasing up hard power space and shortening add instances.
This pro Suite model of JPEGmini utilizes all processing cores for your laptop for faster resizing and exporting performance and may assist JPEG pics as much as 128 megapixels. A plug-in for each Adobe Photoshop and Lightroom is covered, which integrates into your workflow, processing each picture when you export it from either software.
How do the following categories of computer differ from each other?
How do the following categories of computer differ from each other?
What are the 4 types or categorized of computer?
The four basic type of computers are Micro Computer, Mini Computer, Mainframe Computer and Super computer. Computers are classified into different types based on their size and speed. Each of these types of computers are used for different reason based on their features and properties.
The micro computer is the most common type of computer that we use in day to day life. Destop computers, laptop, personal digital assistant, smartphones and tablets are example of micro computer. These computers are widely used and it spread very fastly. The main reason for this is because it is cheap and most people can afford it easily. The calculator we used in our school life is also a micro computer. Mostly these computers are designed to be used by one user at a time. The terms microcomputer relates to the microcomputers which is used in these computers. The use of this microprocessor is to process data and instruction codes. It also can be used for entertainment purpose, education and work purpose.
The micro computers include a memory (to store data) and minimal input/output circuitry mounted on a single printed circuit board. Microcomputers weren’t much popular until 1980s with the advent of powerful microprocessors. The first microcomputer is known as the Altair 8800. It was produced by Micro Instrumentation and Telemetry Systems (MITS), and invented by Ed Roberts. This microcomputer does not have a operating system. Anyway, it accepts the commends entered via a row of switches, because it also didn’t have a keyboard.
The Minicomputers or mid-range computers are the computers which is bigger than a microcomputer and smaller than a mainframe computer. In general, we can say that minicomputer is a multi-processing system capable of supporting from 4 to 200 users simultaneously. One of the main purpose of the minicomputer is to support a small group of users with reasonably powerful computing capability. That’s why minicomputers are mainly used by small companies and firms. The online catalog in many libraries are run by minicomputers.
The setup of minicomputers allowed many people to access computers, which results in a spurt of new application around the world. Minicomputers are introduced in 1960s. Digital Equipment corporation has developed the PDP-1 ( a minicomputer) in that time. The one of the most popular minicomputer is Texas Instrument TI990. It was a series of 16 bit minicomputer sold by Texas Instrument in the 1970s and 1980s.
The Mainframe Computer
Photo by Tima Miroshnichenko on Pexels.com (Laptop in photo is not a mainframe computer)
The Mainframe computer is large and expensive types of computers which can support thousand of users simultaneously. These kinds of computers are mainly used by governments and large organization with thousand of customers, for bulk data processing, critical applications, transaction processing, census, industry and consumer statistics among others. These computer are very powerful but not as much as supercomputers. It can store and process terabytes of data. Mainframe computers can be accommodated in large rooms, because of their size and air condition is necessary due to the heat it produces.
In Maldives companies like Ooredoo or dhiraagu (service providers) can use these kind of computers to store theirs customers data securely. The main difference between a mainframe and supercomputers is that a supercomputer channels all its power into executing a few programs as fast as possible, whereas a mainframe uses its power to execute many programs concurrently.
The supercomputers are extremely fast computer which can perform hundreds of million of instruction in fraction of seconds. They are the fastest computer in the world. These are very expensive and used for special application that requires lot of mathematical calculation. The weather forecasting and nuclear energy researches are done using the supercomputers. These computers are also big in size like mainframe computers due to its numerous parts and components involved in their design. One of the example of supercomputer is Tianhe 2. Tianhe-2 also known as TH-2 is a 33.86-petaflops supercomputer. It is located in China. It was developed by a team of 1,300 scientists and engineers.